Set up Amazon SES with SynerMail
1. Create an AWS IAM user
SynerMail needs AWS credentials to connect to Amazon SES.
It is better to create a dedicated IAM user for SynerMail instead of using the AWS root account credentials. A dedicated user can be disabled or have its access keys rotated without affecting other AWS services.
In the AWS console, open IAM.
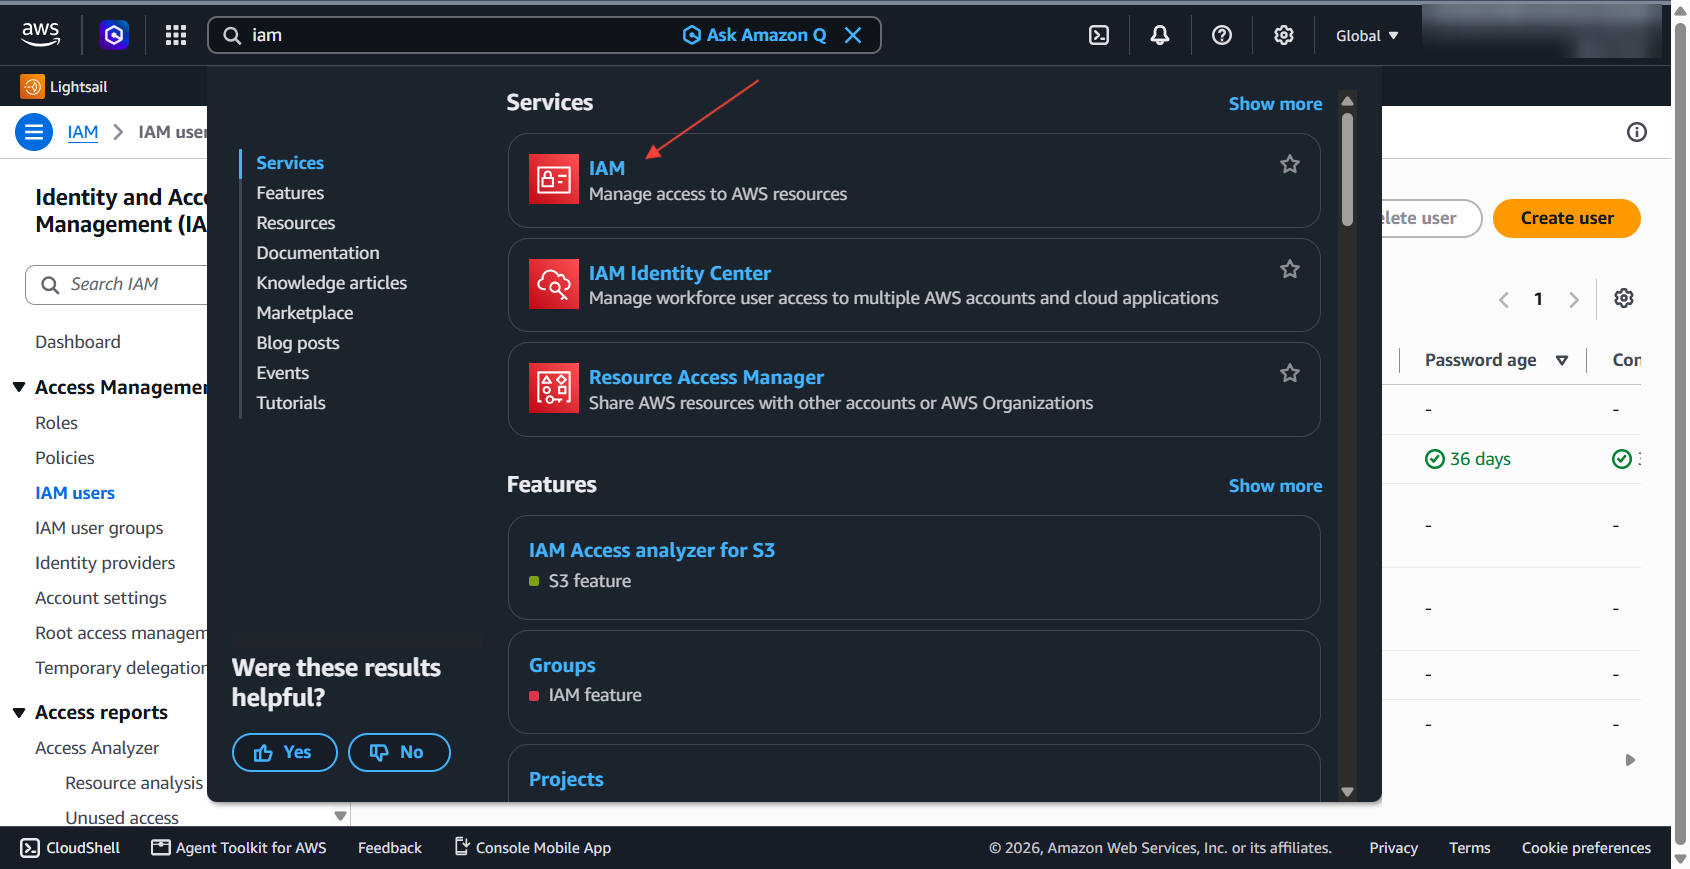
Go to IAM → Users and click Create user.
You can use a name such as:
syner-mail-ses
The user does not need console access because SynerMail will use its access key to access AWS.
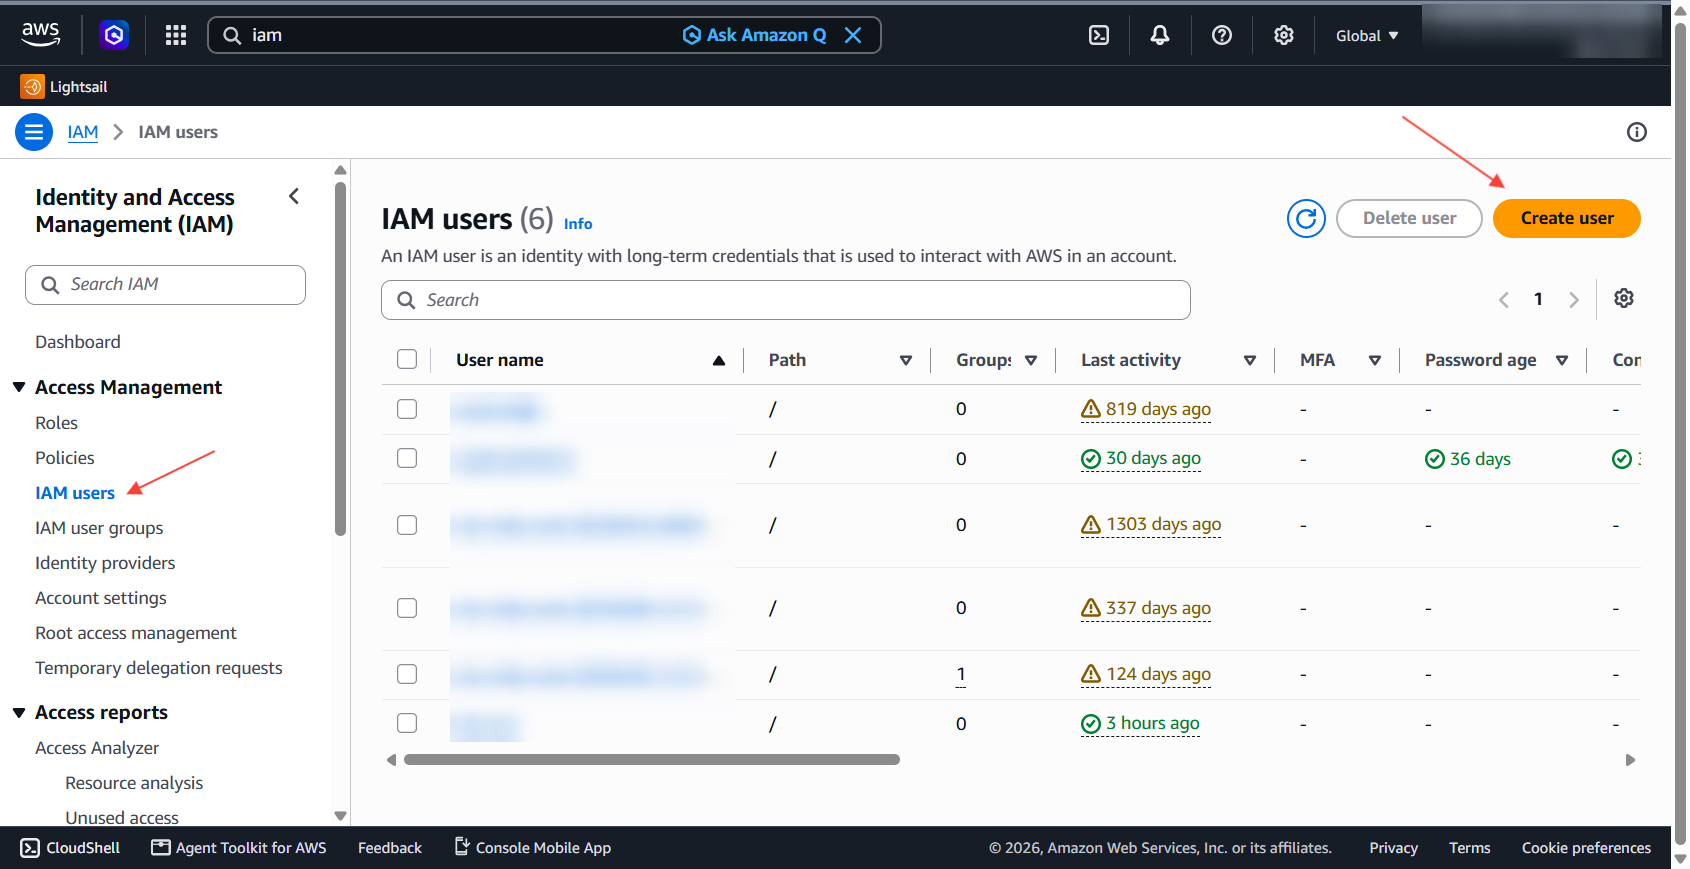
Attach the required permissions
On the permissions step, choose Attach policies directly.
Attach these three AWS managed policies:
Policy Used by SynerMail for
AmazonSESFullAccess Sending email and managing SES identities
AmazonSNSFullAccess Creating and configuring the SNS resources used for bounce and complaint notifications
IAMReadOnlyAccess Checking the AWS credentials and permissions when you use Test Connection
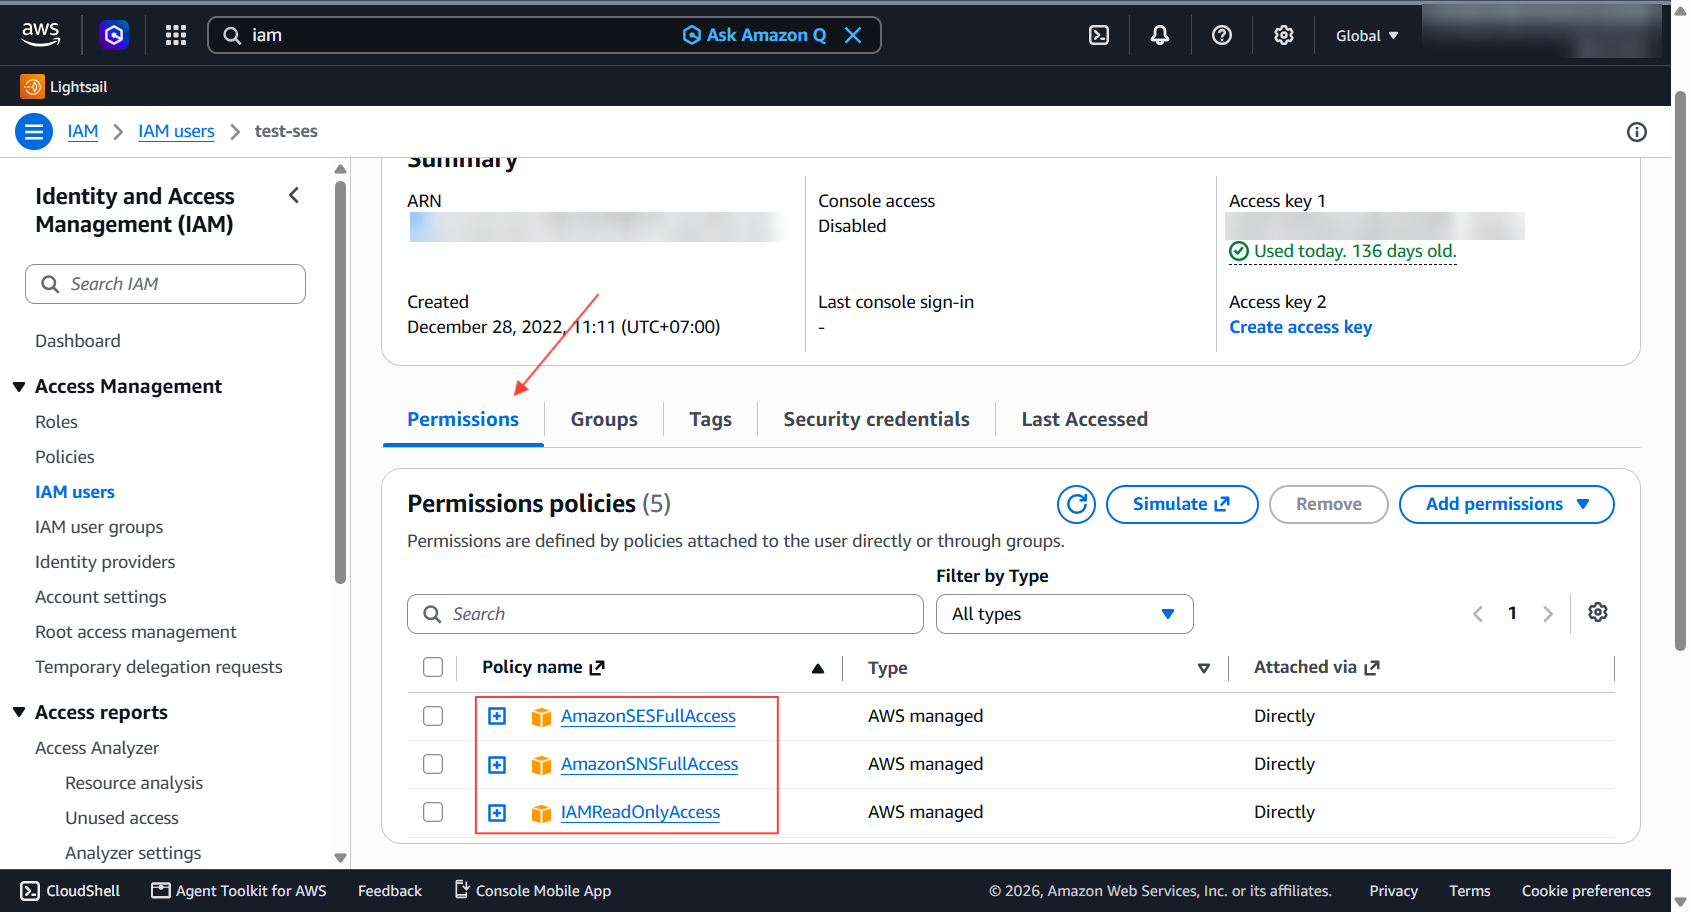
These policies provide broader permissions than a custom least-privilege policy. If the AWS account is dedicated to SynerMail, this can be a practical setup. If the account also contains other production resources, consider creating a more restricted IAM policy instead.
Create an access key
Open the IAM user's Access keys section and click Create access key.
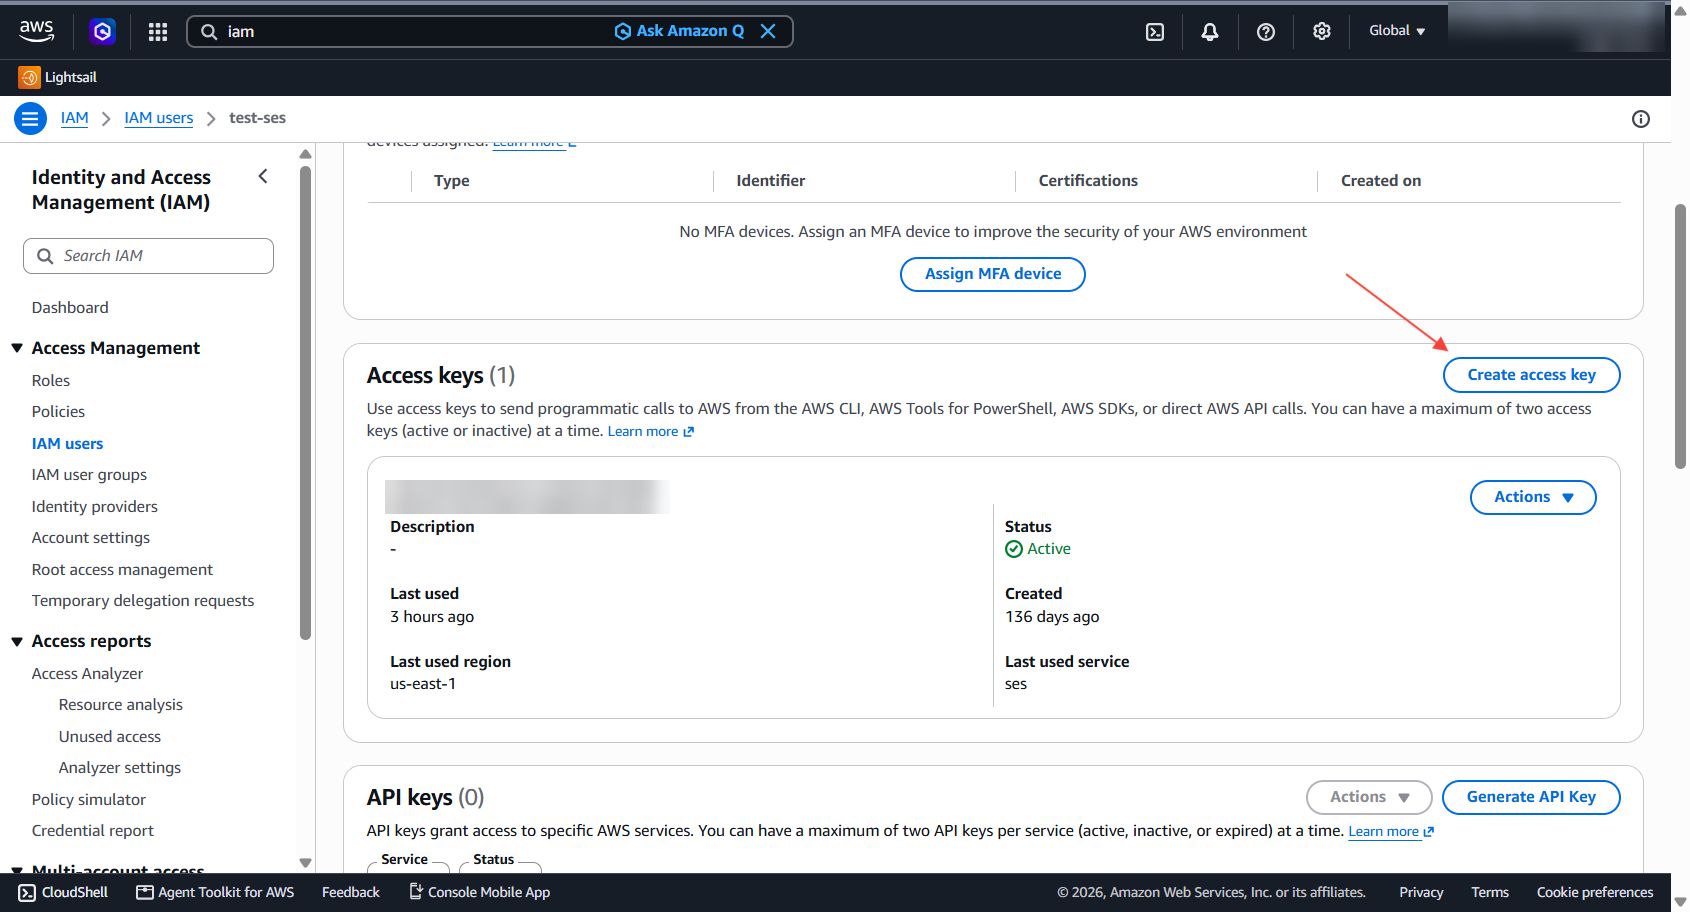
When AWS asks what the key will be used for, choose Third-party service.
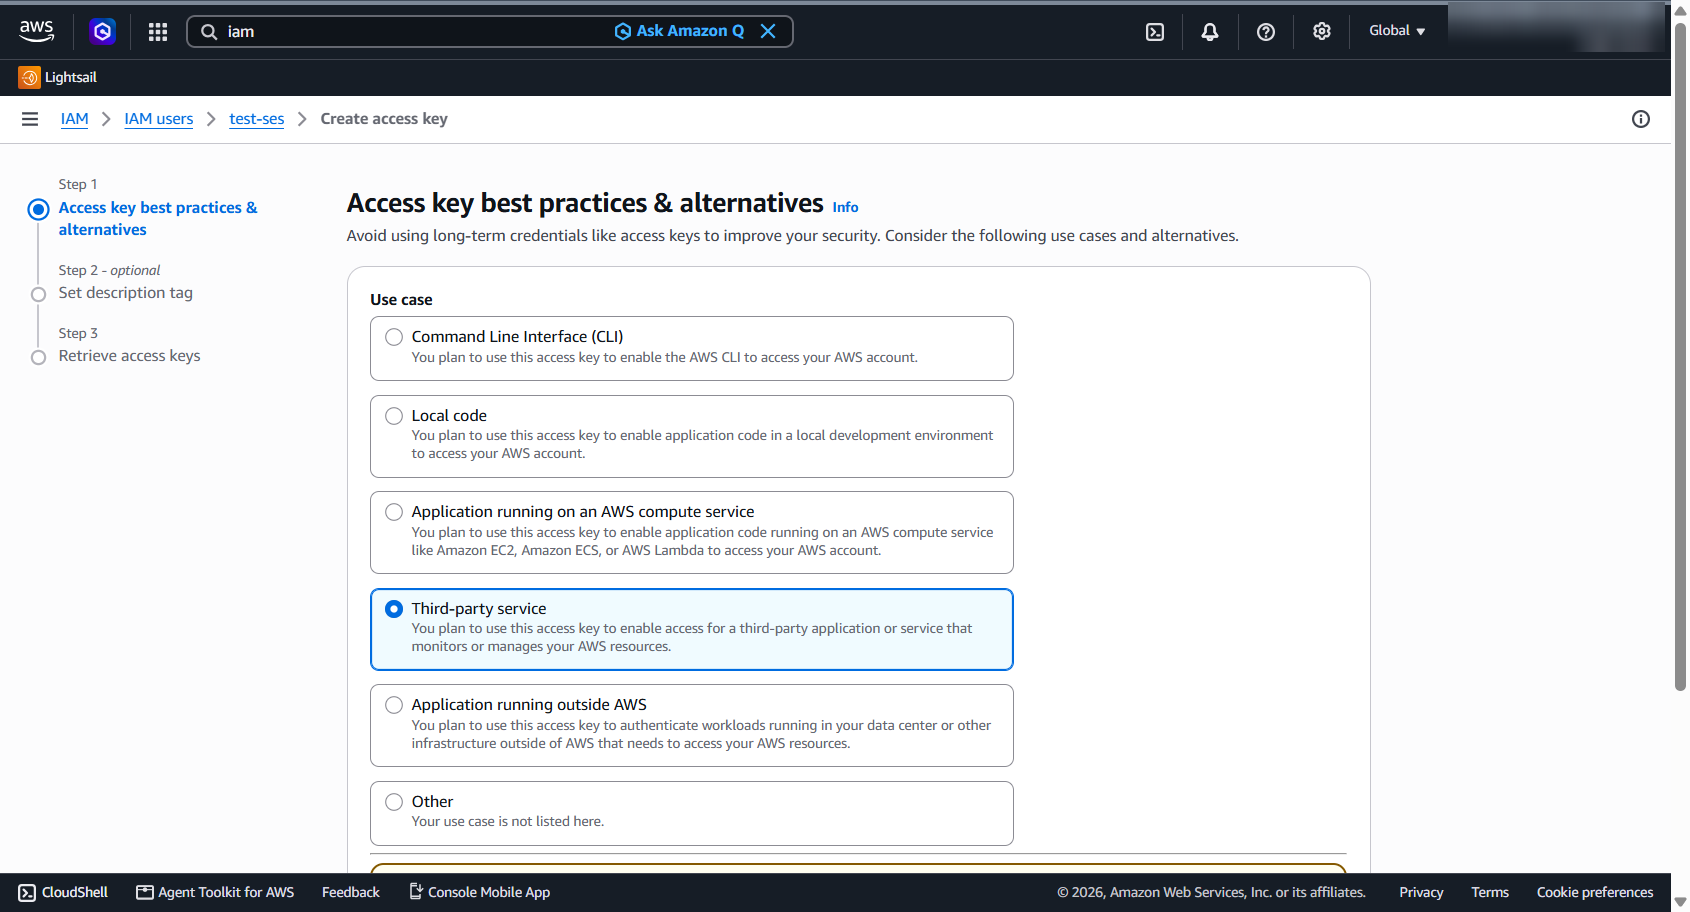
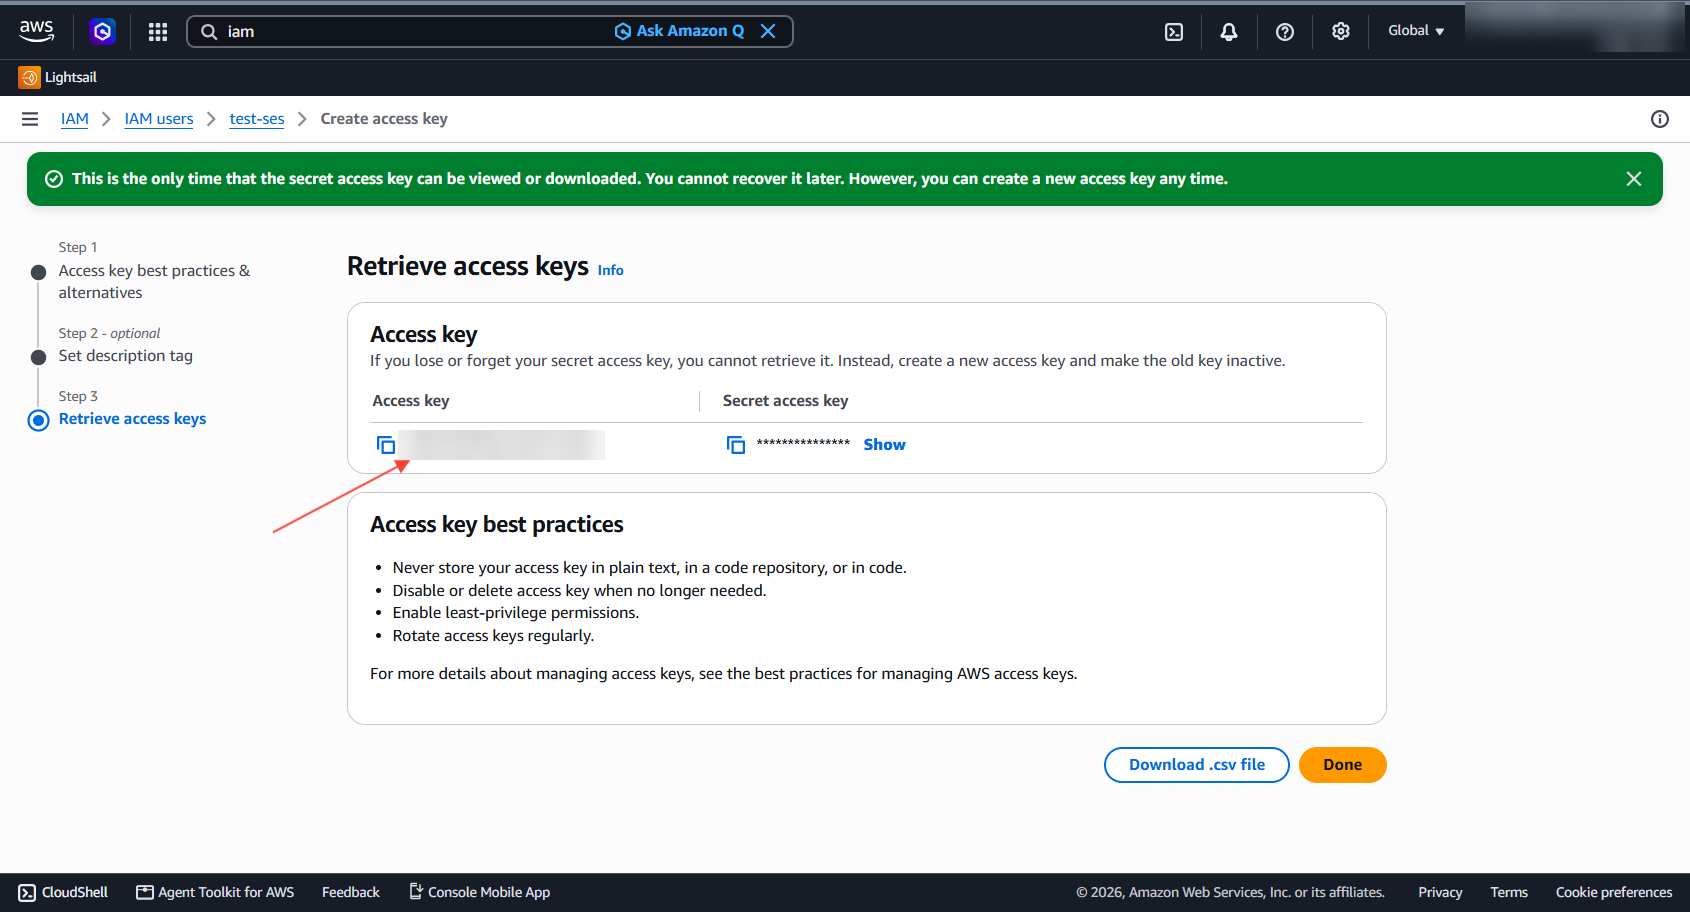
AWS will then show the Access key and Secret access key.
Save both values. AWS only shows the secret access key when it is created. If you lose it later, create a new key and deactivate the old one.
SynerMail stores the AWS credentials in its database because it needs to access SES without user interaction. The AWS secret access key is encrypted at rest.
You should still use a dedicated IAM user, limit its permissions where practical, and rotate its access keys periodically.
2. Add Amazon SES to SynerMail
Once you have the AWS access key, add it to SynerMail.
Log in to SynerMail as an administrator and open:
Sending → Sending Servers
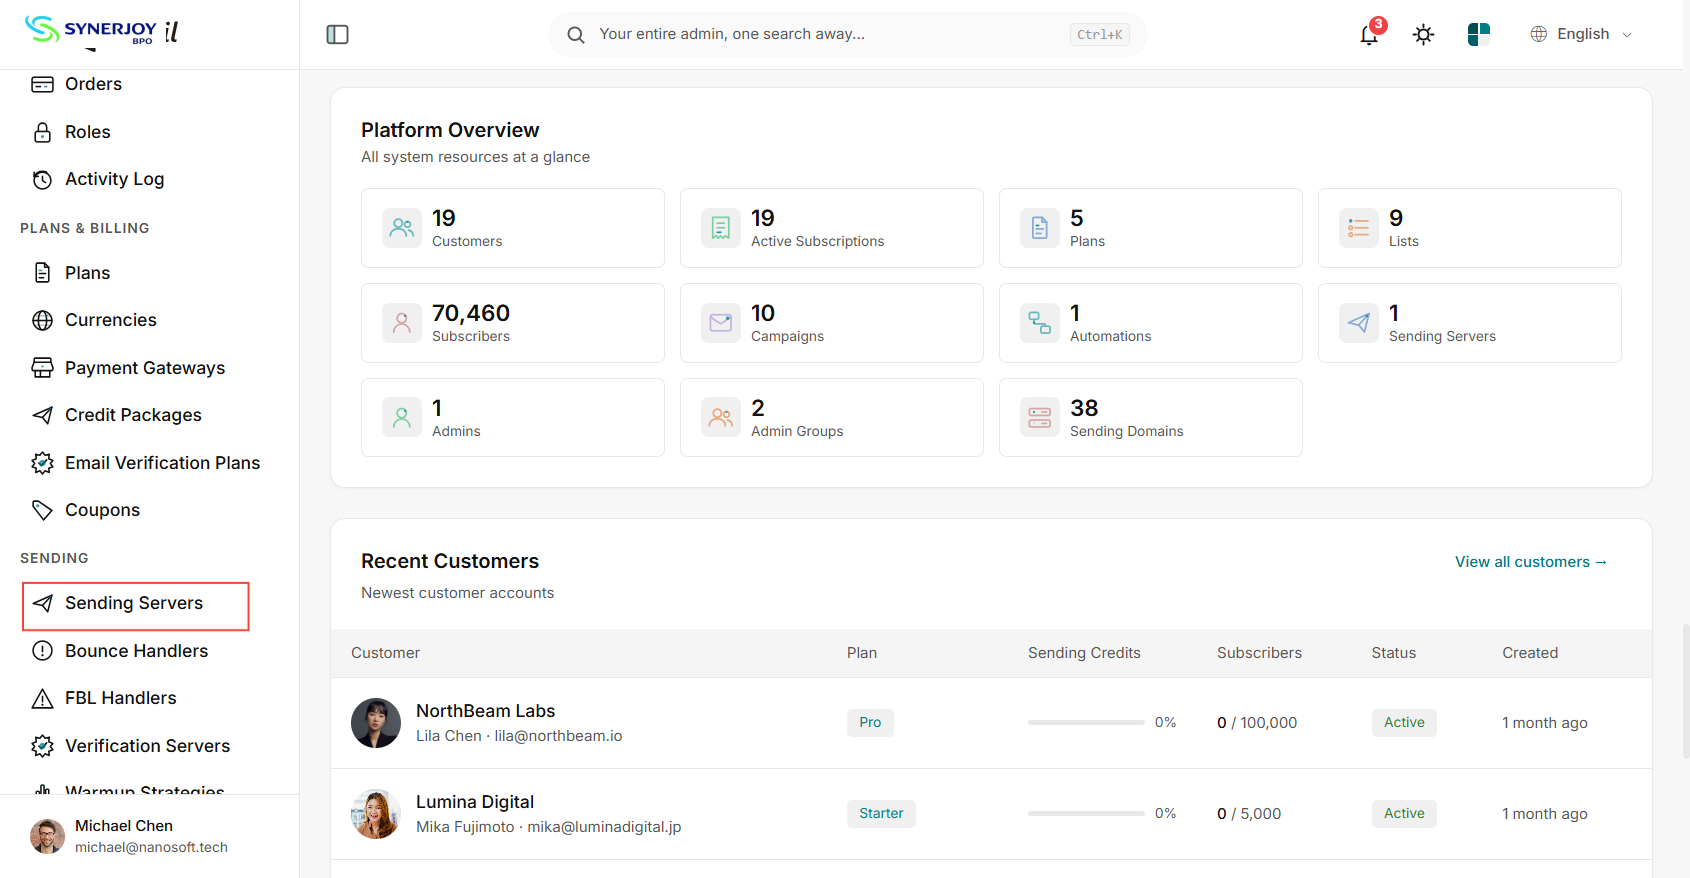
Click Add Server and select:
Amazon Web Service API
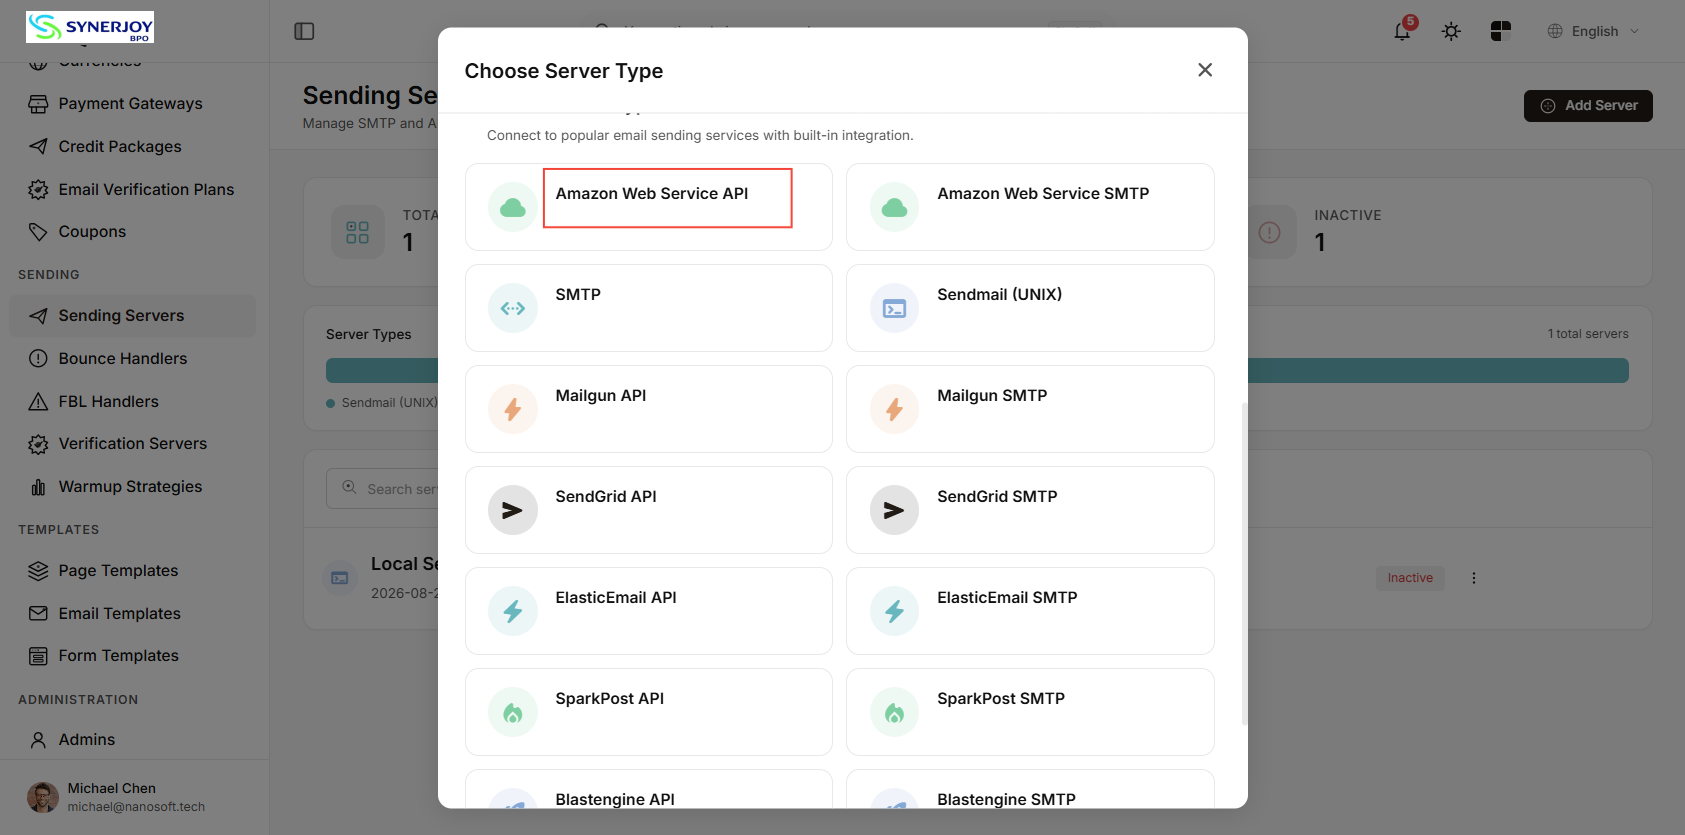
SynerMail also supports Amazon Web Service SMTP. The SMTP option requires SES SMTP credentials, while the API driver uses the AWS access key directly.
For this setup, we recommend the Amazon Web Service API driver.
Under Connection details, enter:
AWS Access Key ID
AWS Secret Key
AWS Region
The region is important because Amazon SES identities and quotas are regional.
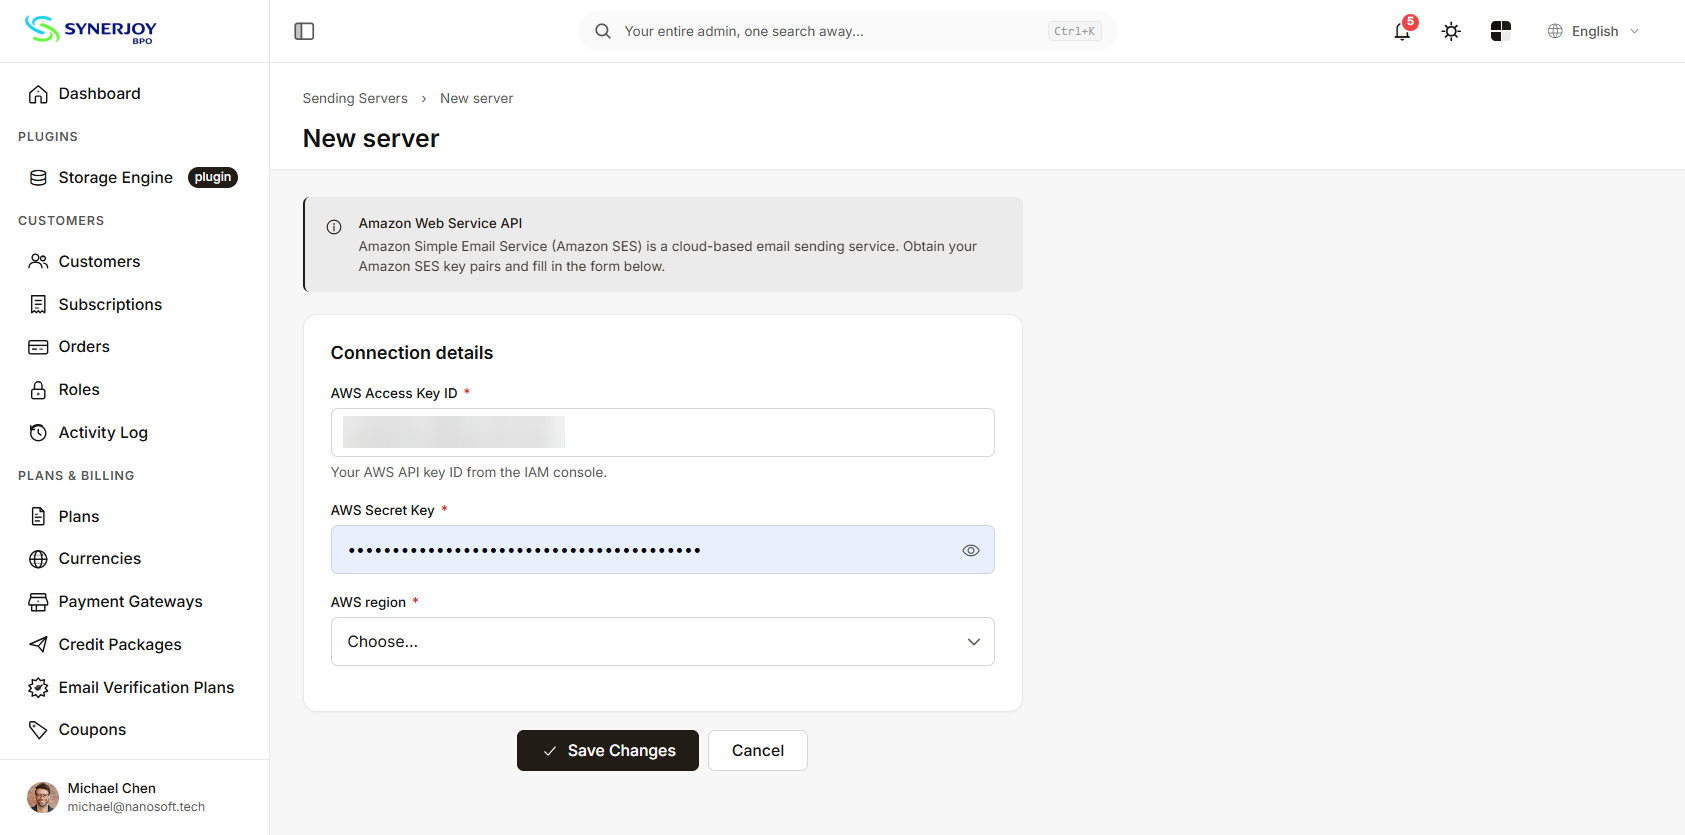
Click Save Changes.
Test the connection
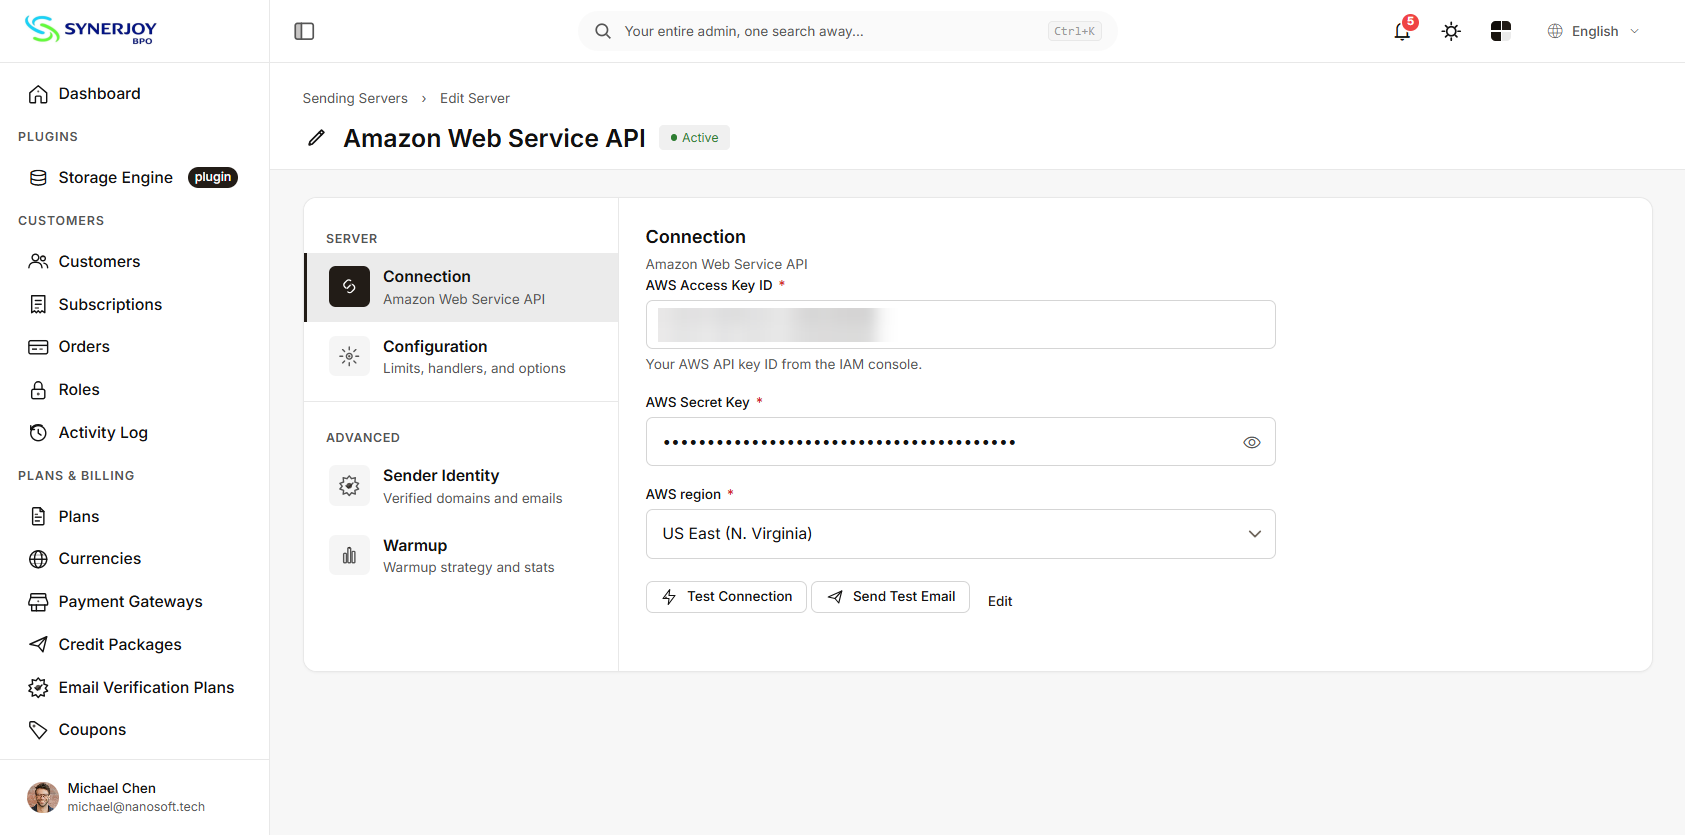
After saving the server, SynerMail provides two useful tests.
Test Connection checks the AWS credentials and the permissions required by SynerMail.
Send Test Email sends an actual email through Amazon SES.
Use Test Connection first. If it reports a permission problem, fix the IAM permissions before testing email delivery.
If the SES account is still in the sandbox, the test recipient must be a verified email address.
If you are running SynerMail with multiple users or plans, also make sure the sending server is assigned to the appropriate plan. A correctly configured sending server will not send anything if no plan or user is allowed to use it.
3. Bounce and complaint notifications
SynerMail uses Amazon SNS to receive bounce and complaint notifications from SES.
When the SES sending server is connected, SynerMail creates the required SNS topic and subscription automatically.
This allows SynerMail to receive notifications from SES and associate them with the corresponding contacts. Contacts affected by hard bounces or complaints can then be excluded from later campaigns.
There is one important requirement: your SynerMail installation must be publicly accessible.
SNS needs to send notifications to an endpoint on your SynerMail installation. A localhost address, private IP address, or VPN-only hostname cannot receive these notifications from AWS.
Make sure APP_URL points to the public URL of your SynerMail installation before enabling the SES server.
If this is not configured correctly, email sending may still work, but bounce and complaint notifications will not be processed.
4. Share verified sender identities
Every email sent through SES must use a verified sender identity.
If you have already verified domains in Amazon SES, you can manage them from the SynerMail sending server:
Advanced → Sender Identity
The list shows the SES identities available in the selected region.
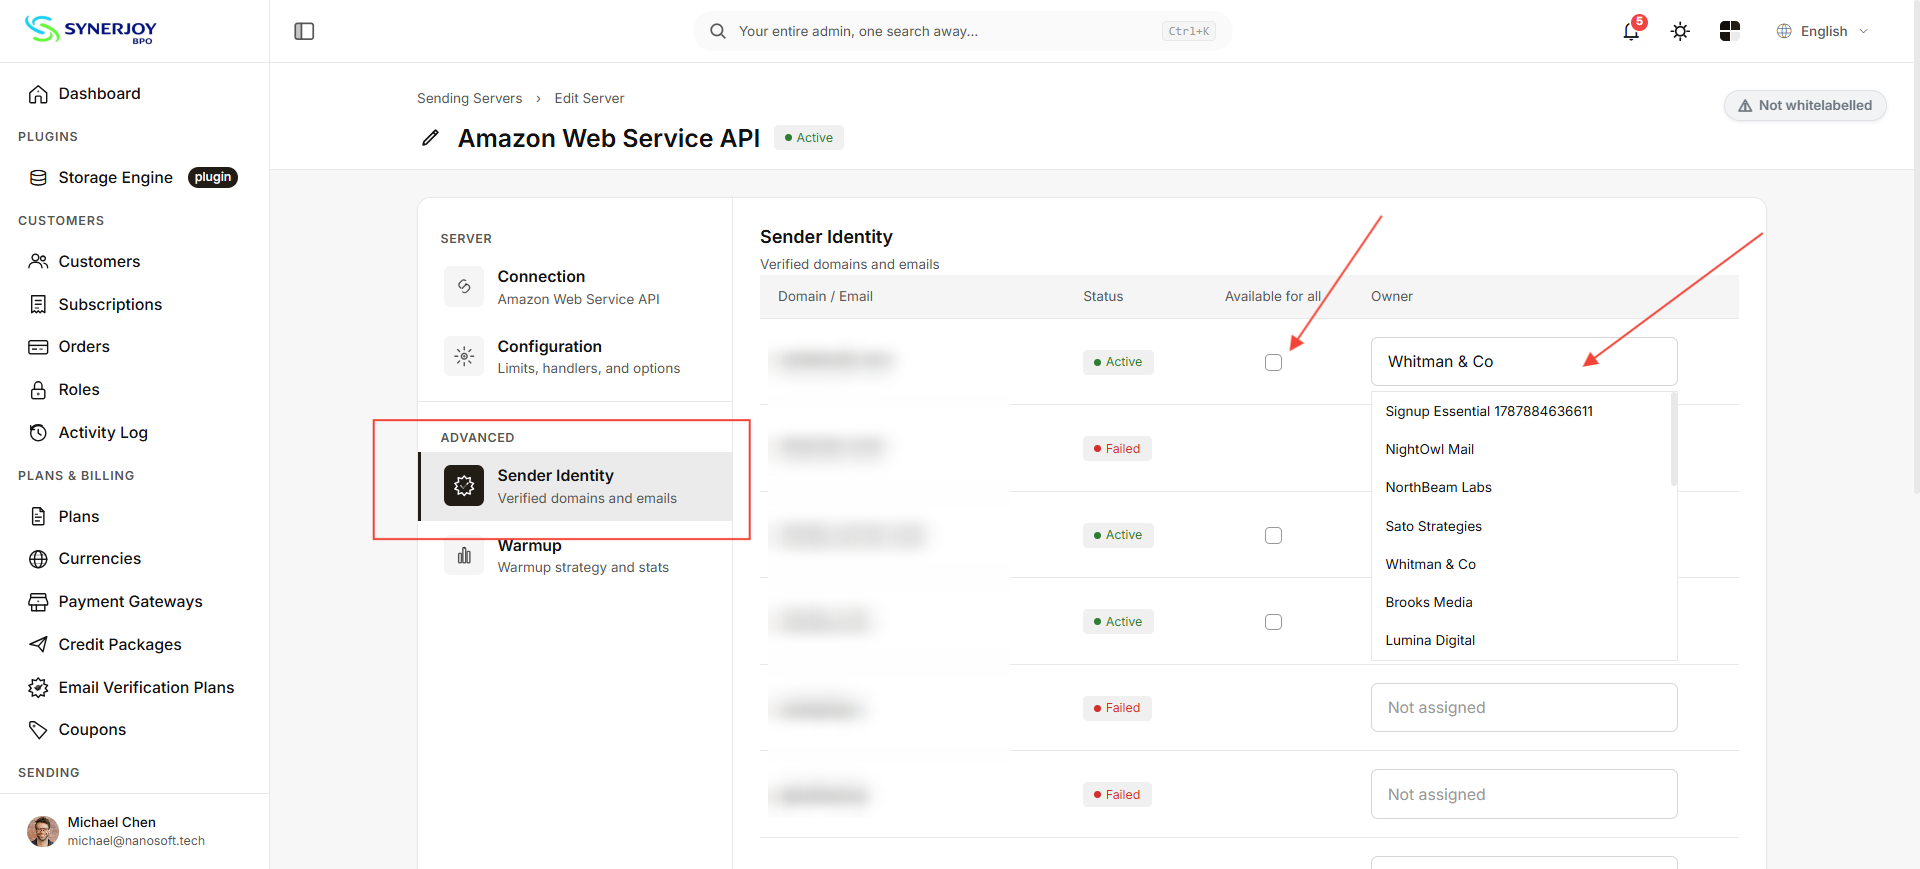
You can make a verified domain available in two ways.
Available for all
Enable Available for all if all users on the SynerMail installation should be able to send from that domain.
Assign to a user
Alternatively, set an Owner for the identity. The selected customer will then be able to use that domain.
Only identities with an Active status can be used for sending.
If an identity is marked Failed, the problem needs to be fixed in Amazon SES or DNS before it can be used.
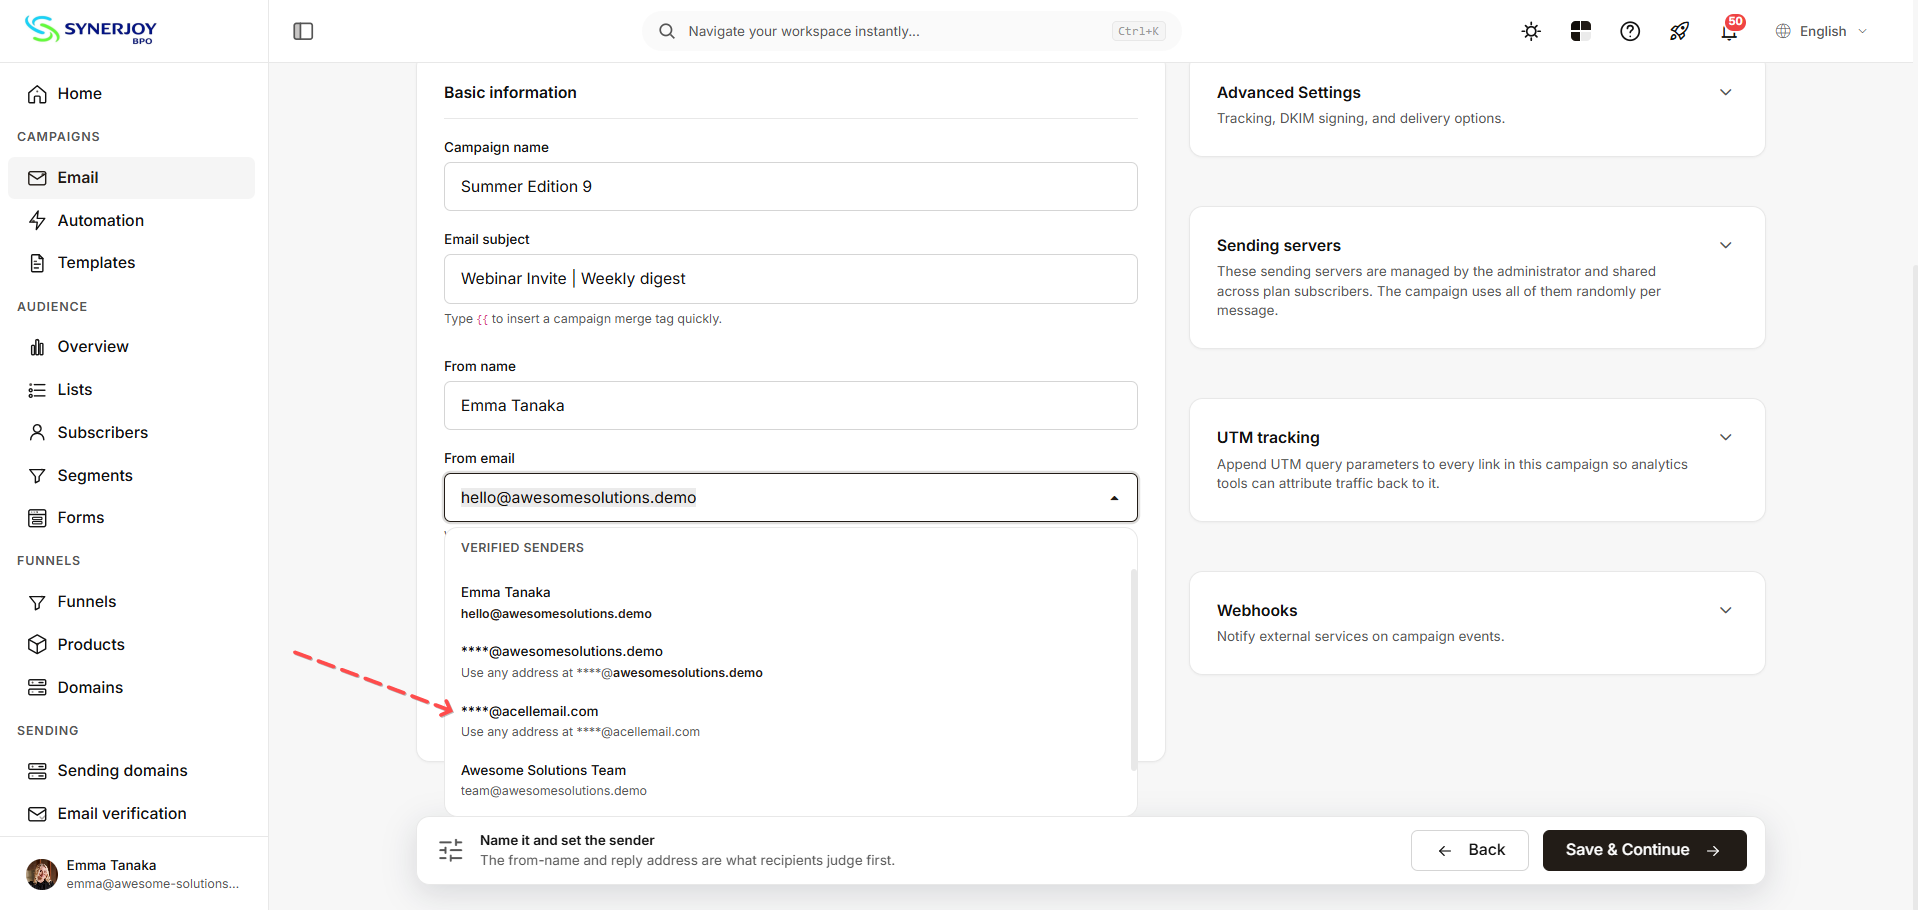
Once a domain is available to a user, it appears in the campaign's From email field under Verified senders.
5. Add customer sending domains
In a multi-user SynerMail installation, customers will usually want to send from their own domains.
A customer can add a domain from:
Sending domains → Add domain
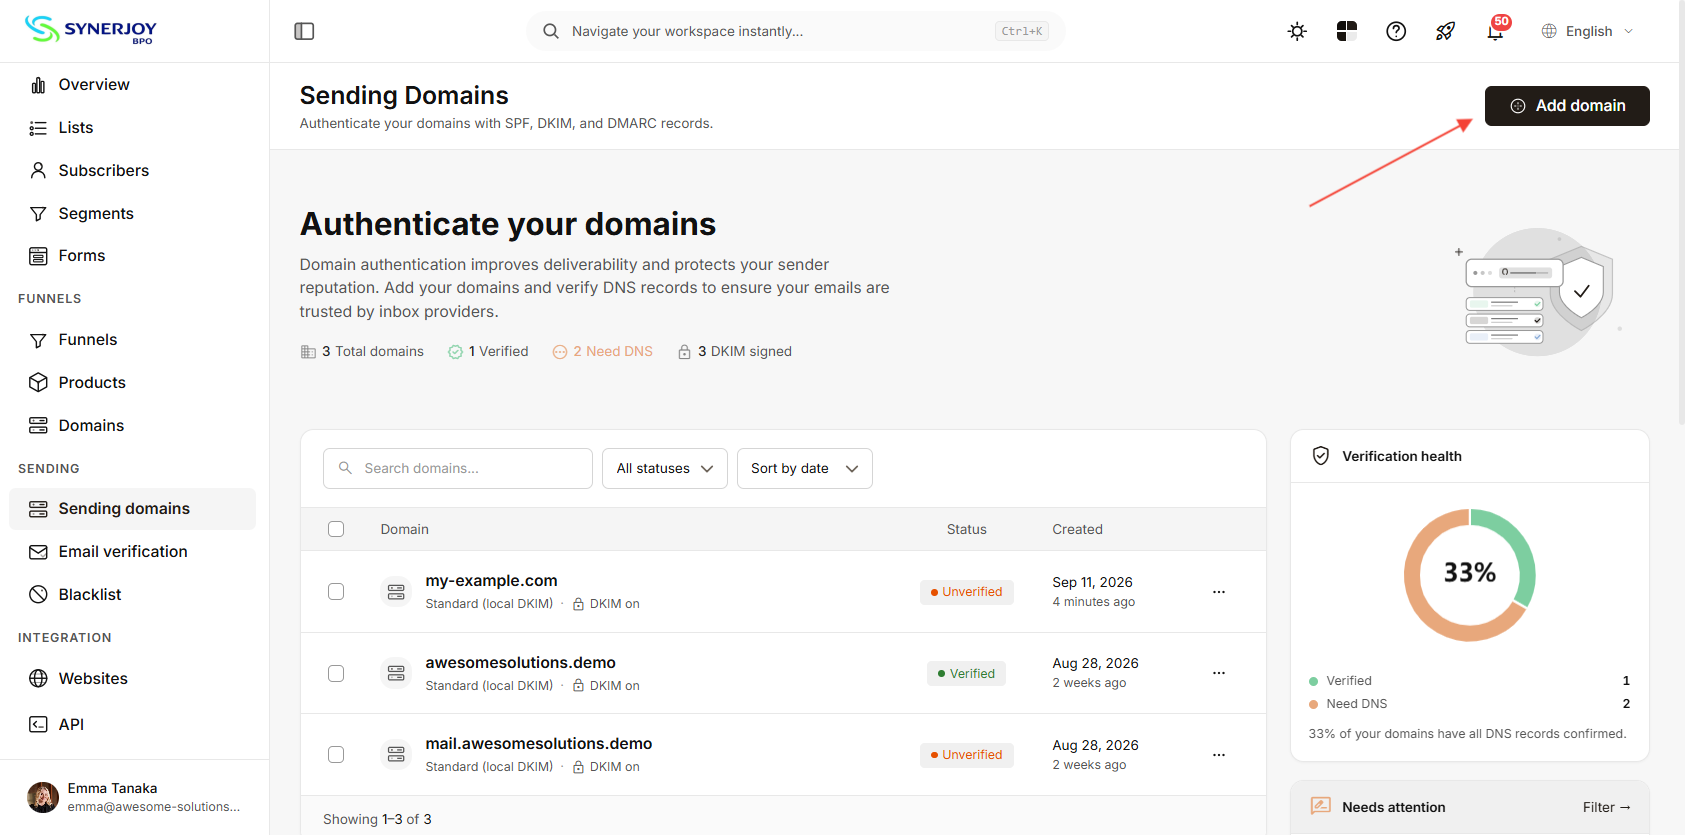
When the customer's account uses the Amazon SES sending server, SynerMail registers the domain with SES and displays the DNS records that need to be added.
The domain page shows a Synced · Amazon SES status and the required records.
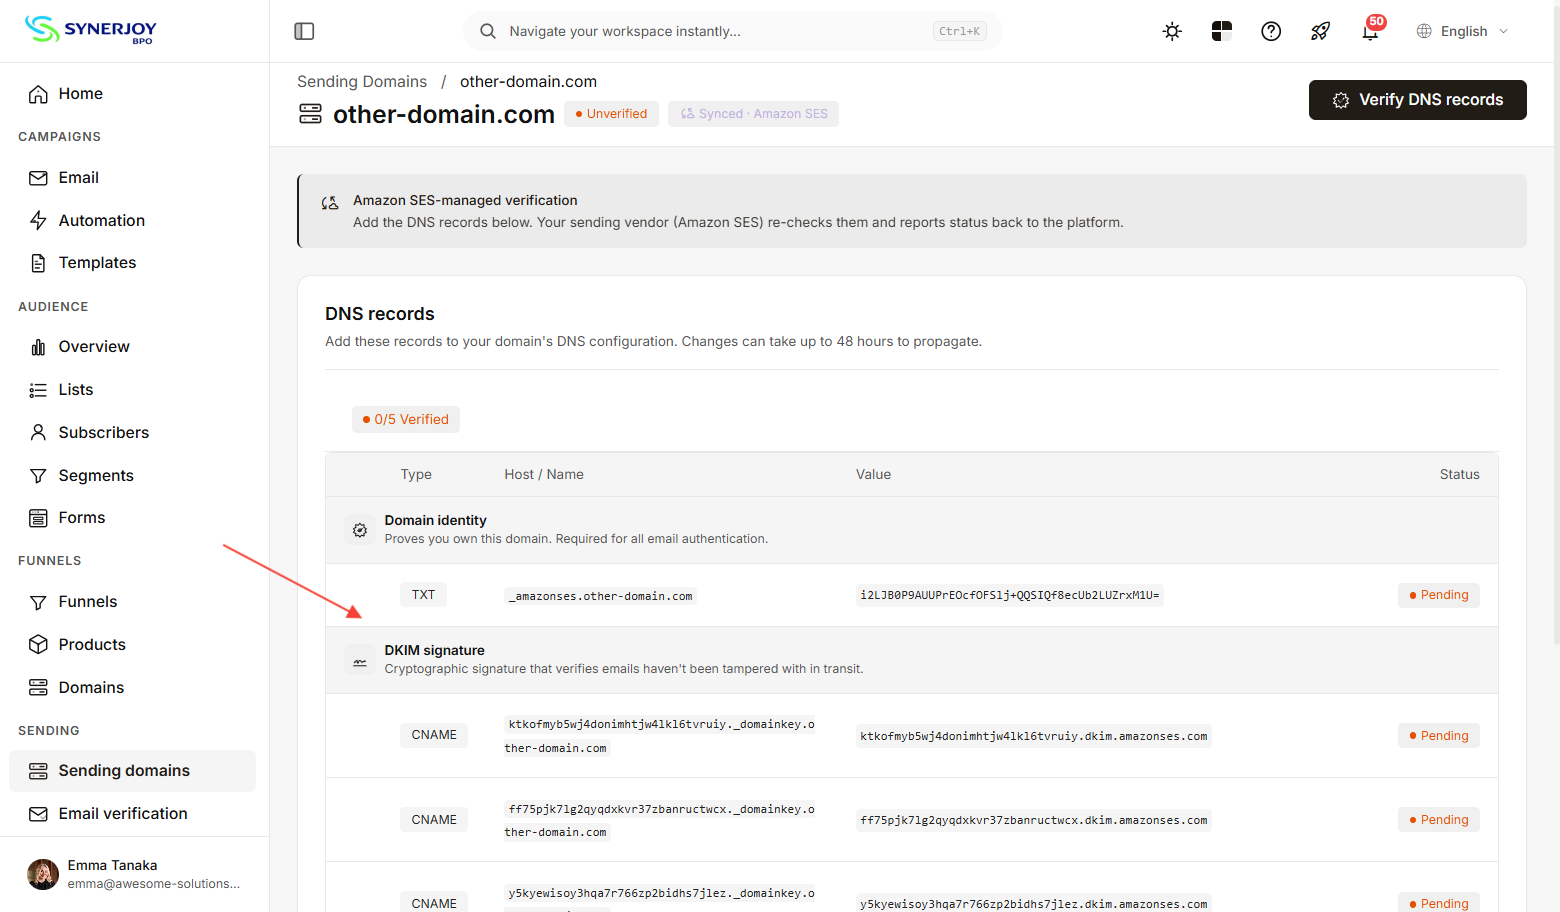
The records normally include:
Domain identity — a TXT record at _amazonses.theirdomain.com
DKIM — three CNAME records ending in .dkim.amazonses.com
SPF — a TXT record containing v=spf1 include:amazonses.com ~all
After publishing the records, click Verify DNS records in SynerMail.
DNS changes can take some time to propagate, so the verification can be run again later.
Two common DNS problems
Do not create multiple SPF records
A domain should have one SPF record.
If the domain already has an SPF record for Google Workspace or another email service, add the Amazon SES include to the existing record instead of creating a second SPF record.
For example:
v=spf1 include:google.com include:amazonses.com ~all
Multiple SPF records can result in a permerror and cause SPF validation to fail.
Check how your DNS provider handles record names
Some DNS providers automatically append the domain name to the host field.
For example, entering:
_amazonses.theirdomain.com
may result in:
_amazonses.theirdomain.com.theirdomain.com
If the SES identity remains in Pending, check the actual DNS record rather than relying only on what is shown in the DNS control panel.
You can check the TXT record with:
dig +short TXT _amazonses.theirdomain.com
And a DKIM record with:
dig +short CNAME <selector>._domainkey.theirdomain.com
6. SES sandbox, quotas and regions
There are three Amazon SES settings you should check before sending a real campaign.
SES sandbox
New SES accounts start in the sandbox, and the restriction applies per region.
In the sandbox:
recipients generally need to be verified
the sending limit is 200 messages per 24 hours
the sending rate is 1 message per second
To request production access, open the SES Account dashboard and choose Request production access.
The review is asynchronous, so it is worth requesting production access while you are configuring your domains and SynerMail.
Sending quotas
Production access does not mean that every AWS account has the same sending quota.
SES sets sending quotas per account and region. Check the current quota in the AWS Account dashboard and use that value when configuring sending limits in SynerMail.
Do not assume that a commonly quoted quota such as 50,000 emails per day applies to your account.
AWS regions
SES identities and sending quotas are regional.
For example, if you verified a domain in:
us-east-1
but configured SynerMail to use:
eu-west-1
the verified identity will not appear in the SynerMail server's Sender Identity list.
Make sure the region used by SynerMail is the same region where your SES identities are configured.
7. Common problems
What you see What it usually means
Action ses:... is not allowed / sns:... The IAM user is missing a required permission
The security token included in the request is invalid The access key is incorrect, truncated, or deactivated
Email address is not verified The SES account is still in the sandbox for that region
AWS SNS will not be able to reach it… APP_URL is not publicly accessible
Sender Identity list is empty The SynerMail server region does not match the SES region
Customer domain remains Pending The DNS record may have been entered incorrectly or DNS has not propagated
This domain is already registered on the system sending server… The domain was already registered in SES and needs to be assigned through Sender Identity
Summary
To connect SynerMail to Amazon SES:
Create a dedicated AWS IAM user.
Give it the permissions required by SynerMail.
Create an AWS access key.
Add the credentials to an Amazon Web Service API sending server in SynerMail.
Use Test Connection before sending a campaign.
Make sure APP_URL is publicly accessible so SNS can deliver bounce and complaint notifications.
Verify your sending domains and publish the required DNS records.
Keep the SES region consistent between AWS and SynerMail.
Check your actual SES sending quota before configuring sending limits.